
How To Build Your Own Garden Beds
As the ground begins to thaw and blossoms start sprouting, you may find yourself itching to get your hands dirty in the garden again. If you’ve been nurturing a few potted herbs for a while and are looking for a sign to commit to a bigger garden, this is it! Garden beds can be tailored to each person’s needs and make the best homes for your fruits and veggies. Here is a how-to-guide for in-ground garden beds that will ensure your plants are happy and healthy this spring.
THE BASICS
Stephanie Griggs, owner of Bookcliff Gardens in Grand Junction, recommends doing some prep work to start.
“It’s a really great idea to sketch your bed out on paper. Then, determine your planting zone. Grand Junction is considered a 7a*, but the valley could also be more 6b**. This will vary depending on elevation in Colorado. Your local nursery can help you with this or research on the internet,” she explains.
The size of your beds are also dependent on how many edible goodies you want to pack in. Seed packets and sprouted plants’ tags will indicate how much space each plant needs to grow successfully. Do some research about the fruits and veggies you’re hoping to plant in order to determine just how big you need the beds to be. It’s easy to get carried away during this step, so Griggs advises to start small, especially for first time gardeners.
* Zone 7a: This subzone has a minimum average temperature of 0° to 5° F.
** Zone 6b: This subzone has a minimum average temperature of -5° to 0°F.

IMAGE 1
“My philosophy for having a garden is to grow what you love. What do you like to eat? What flowers do you love? Then do the research and planning,” she says.

IMAGE 2
TOOLS

IMAGE 3
The in-ground garden beds are a great option for beginners who are just starting out and maybe aren’t sure exactly how they want their garden to be set up. In-ground beds are much easier to build, but do tend to put more strain on the body when actually gardening. These garden beds are built on existing ground, which allows roots to reach far into the soil without impediments.

IMAGE 4
According to Griggs, “The common size for beds are about four feet wide by 18 inches tall, and the length can be determined by materials or dimensions of total garden space.”
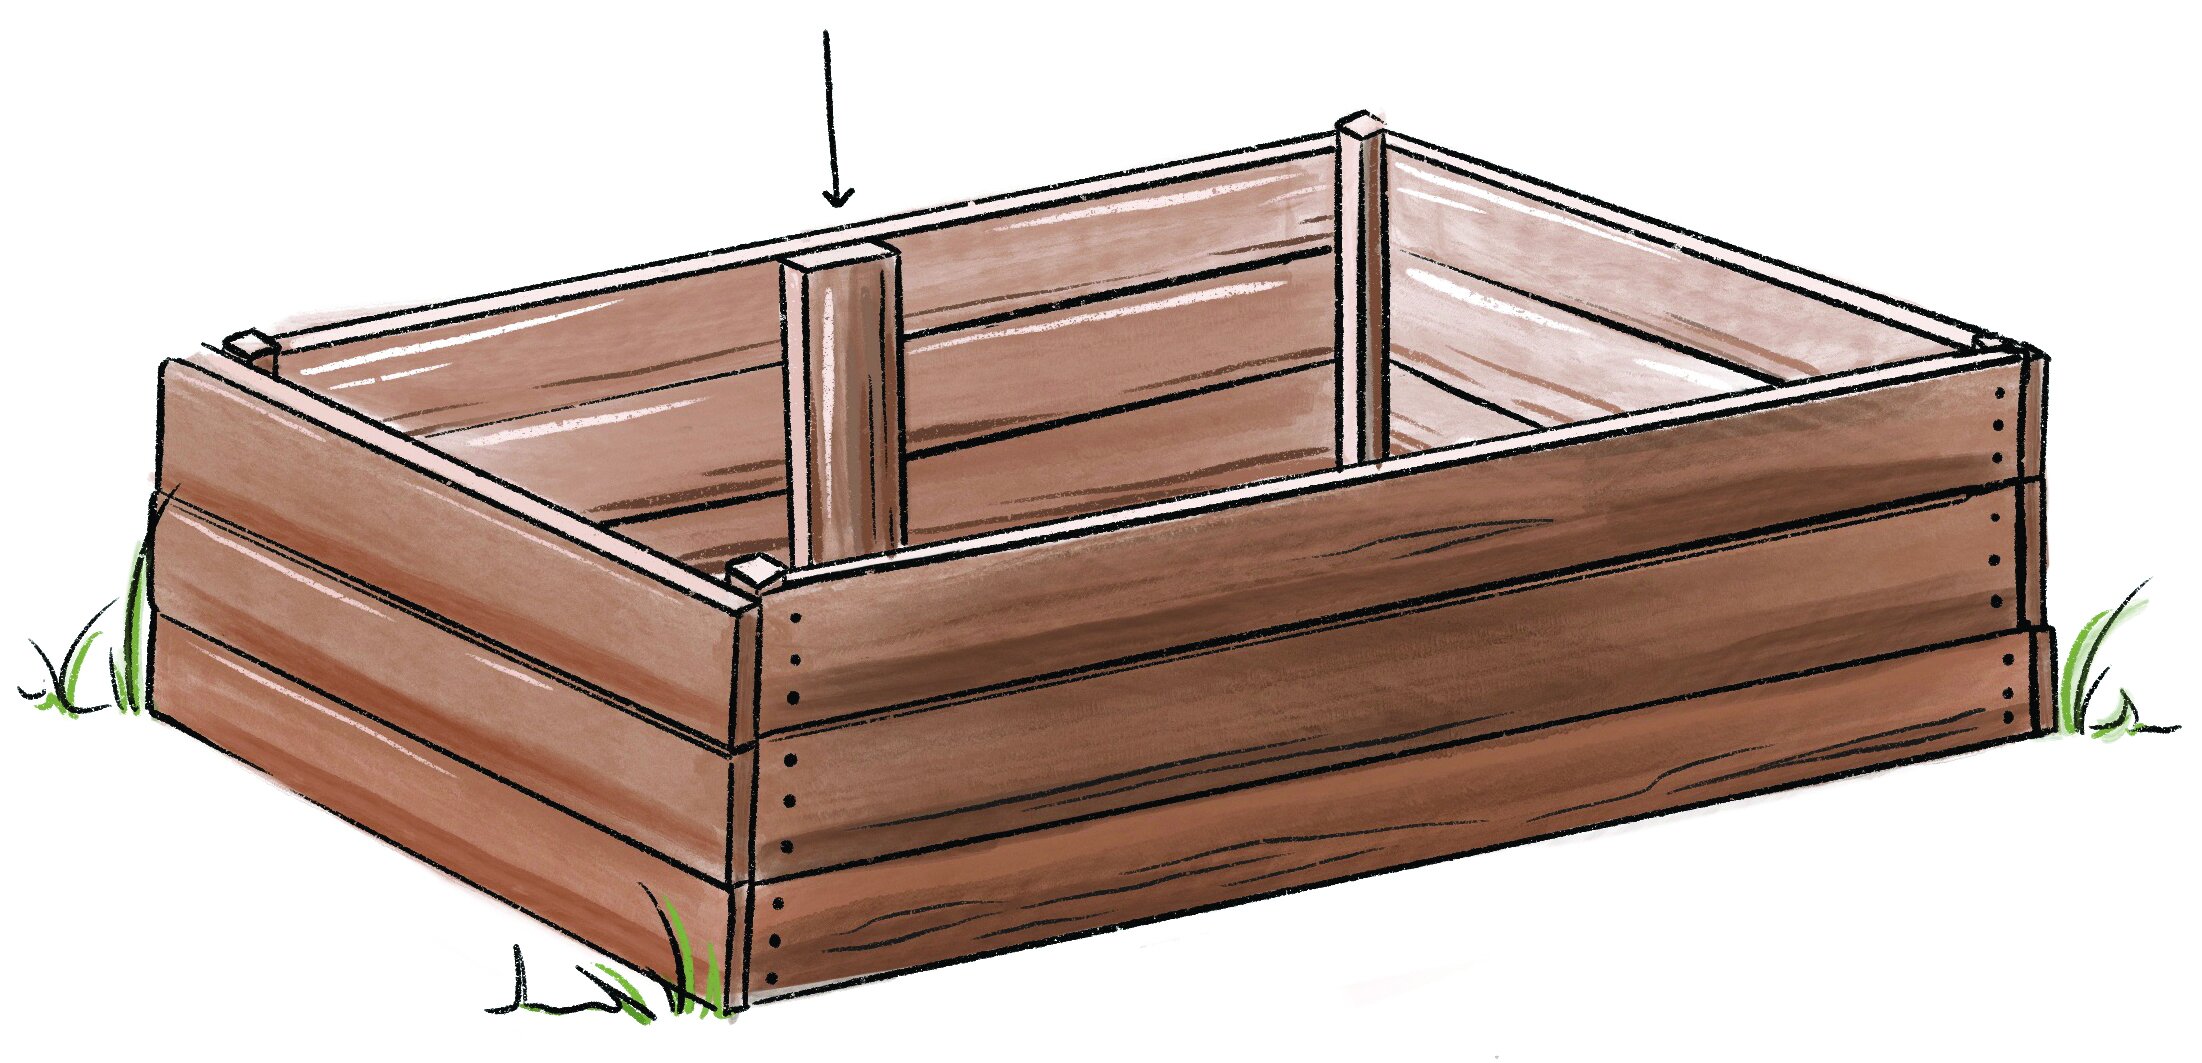
IMAGE 5
When purchasing materials, your local hardware store should have all the lumber needed, just remember to ask if it’s treated or not. Treated wood will leach chemicals into the soil and contaminate your plants, so be sure to buy untreated. While not absolutely necessary, your beds will last longer if they are sanded down and coated with a stain, which helps protect the wood from the elements it will be exposed to year-round. You’ll also need to purchase screws to hold the frame together.
ASSEMBLY
First, be sure to clean your area properly. Pull all the weeds and/or grasses that will be inside the frame. Then, dig a shallow trough to form a border. This is where the boards will go to create the bed (IMAGE 1). It’s easier to manage if you assemble the bed one corner at a time, working your way around the entire bed. Using an electric drill, screw the shorter edge board into the longer sideboard (IMAGE 2). Or, for a reinforced, sturdier corner, drill both pieces into a four by four (IMAGE 3) that’s the desired height of the bed. Repeat this step in each of the corners. This completes the bed!
However, as mentioned above, kneeling down and reaching across the beds to plant, harvest and provided maintenance can take a toll on the body. To combat this, you can stack more boards on top of each other until the beds reach your desired height. Simply repeat the steps above in each corner (IMAGE 4).
If your beds are really tall and really long, you’ll need to reinforce the longest two sides with a piece of wood or rebar (IMAGE 5). This will prevent the wood from warping due to water or expanding from the weight of the soil. Once the beds are finished, fill with soil and get ready to plant!
NOTE: Depending on the way you plan to water your beds, you may need to extend pipe work up from underneath the bed — generally for soaker or drip systems. Make sure you buy PVC pipe to extend drainage to the top of the bed, so your plants actually get water to their roots.
Illustrations by Claire Kiewatt
Originally published in the Spring 2021 issue